On the Report maintenance page, you can edit the settings of a report, schedule it for e-mail sending or run it directly. Each of these options are explained in the chapters below.
System reports cannot be edited - only default values can be changed.
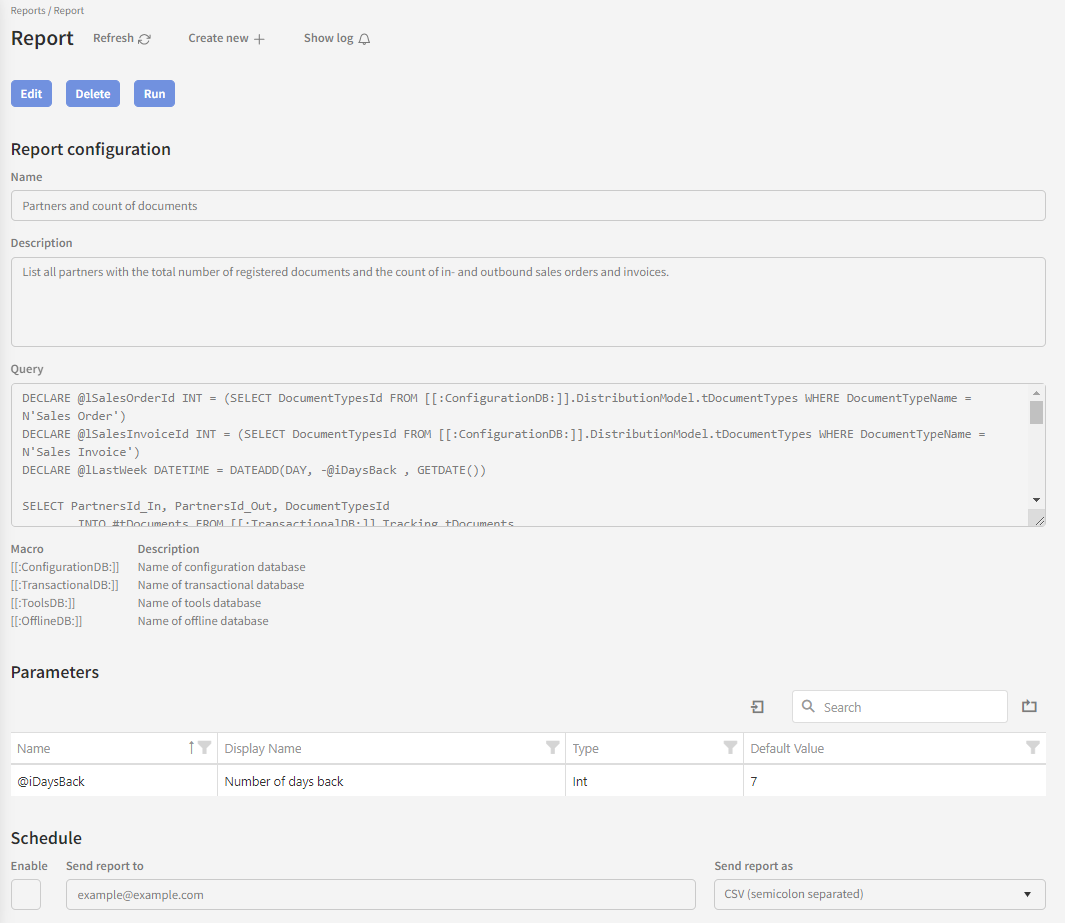
Edit a report
By clicking the “Edit” button, you can alter the individual report fields. Let’s go through them.
Name
The name of the report.
Description
A description of what the report does.
Query
This is the SQL query that performs the search in the database.
NOTE that:
-
Editing this field requires in-depth knowledge of the Link database structure - you should not try to change this without consulting Link support or your assigned technical account manager (TAM) from Bizbrains.
-
Reports are always run in a read-only context, meaning that there is no danger that the report will make any changes in the database.
Parameters
Each report can have 0 to many parameters. When in edit-mode, you have the option of adding or deleting parameters via the ‘+' sign and the ‘Cancel’ and 'Delete’ links in the right side of the parameter grid.
Delete a report
To delete at report, simply press the “Delete” button on the top of the screen. After pressing OK in a confirmation dialogue, the report is removed from the system.
Scheduling the report
From the scheduling section of the screen, you can set up automated e-mails with the report result attached.
Note that when reports are scheduled, they will always use the configured default parameter values.
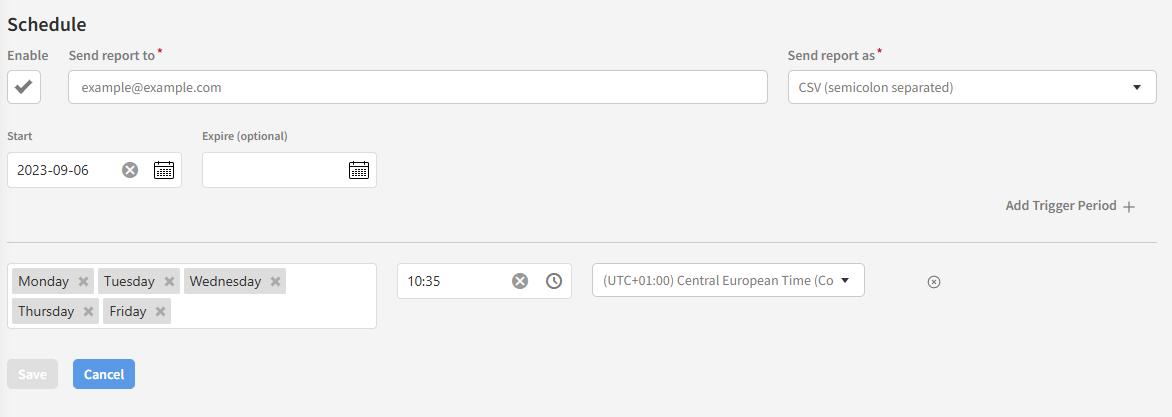
Here follows an explanation of each field.
Enable
When ticking this checkbox, the report schedule is active. If the checkbox is not ticked, nothing will happen.
Send report to
Here you can enter one or several e-mail addresses that will receive the reports. If you wish to send to more than one address, remember to separate them with a semicolon.
Send report as
Here you can select the format of the report result that is attached to the e-mails. At present, only CSV-format is possible.
Start
Here you can enter a start date for the report schedule.
Expire (optional)
If you wish the report schedule to expire, it’s possible to enter an expiration date here.
Triggers
Here you can set up one or several report triggers. In the example above, only one trigger is created; reports will be sent out Monday, Tuesday, Wednesday, Thursday and Friday at 10:35 in CET timezone.
You can add more triggers by pressing “Add trigger”. Triggers can be removed by clicking the little cross to the right of each trigger.
Run the report
To Run a report immediately, press the “Run” button in the top of the reporting screen. This will take you to the “Run” screen.