Usergroups
It is possible to configure Link to allow different types of user groups to have different sets of privileges within the application. An off-the-shelf Link solution comes with a set of roles that can be assigned to application usergroups.
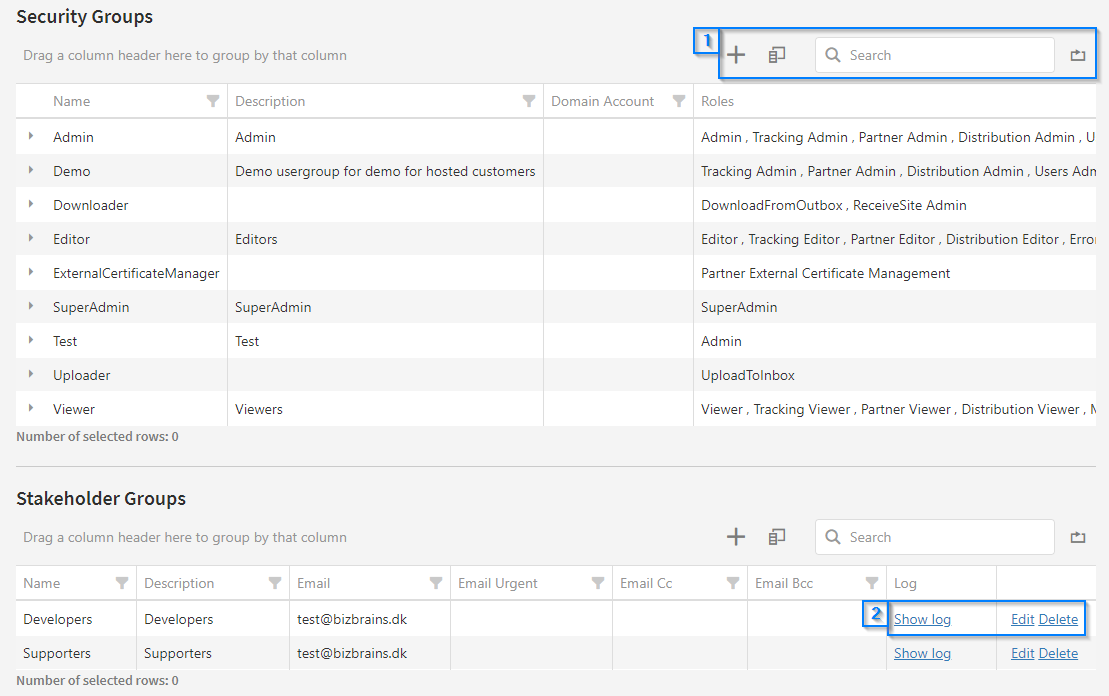
A user group is the function group (work area, department) to which a user belongs. The usergroups page is divided into two sections: Security Groups and Stakeholder Groups. Each section contains a list of usergroups in a data grid.
Depending on your permissons, some features on this page may not be available.
Each feature on the page will be detailed below.
Data Handling [1]

These functions allow you to create new user groups, search and manipulate the data grid. The functions are the same for both data grids. They will be explained from left to right.
Add a row
Click the '+' shaped button to add a new group to the list. A new window will pop-up, allowing you to input the group information. Click save when you are done to create the group. It should appear in the data grid.
Depending on the kind of user group being created (Security and Stakeholder), you will be presented with a different set of fields. Both will be explained in detail below.
Security group:

-
Name*: The name of the group.
-
Domain Account: Will be auto generated for AD integrated users.
-
Data Groups: Add a data group to restrict this usergroup to certain parts of data in the system, like partners, document types, distributions and tracking documents. In this example the usergroup is restricted to only see Purchase data.
-
Description*: Write a short description about the group.
-
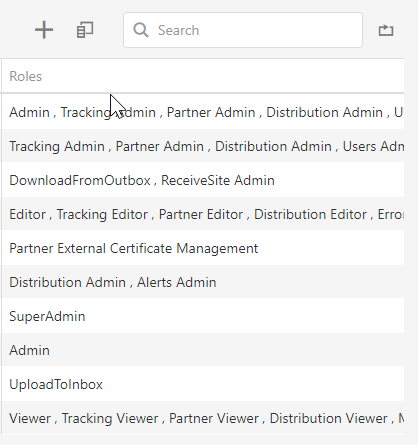
Roles: You can add one or more roles here to determine which privileges this user group should have. To add a role simply click the field. A new window will open. Tick the checkbox for each role you want to add. You can scroll to see additional roles in the window. To remove a role click the 'x' next to the role name.
-
Log: Write the changes made for the group.
* Note that these fields are mandatory.
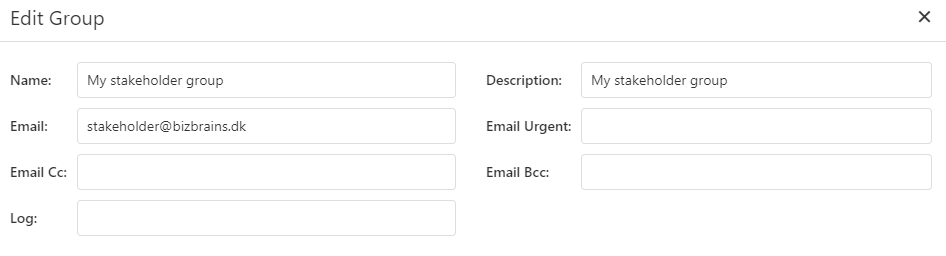
Stakeholder group:
-
Name*: The name of the group.
-
Description*: Write a short description about the group.
-
Email: The email to which the errors should be sent.
-
Email Cc, Urgent, Bcc: Optional. Add additional recipients in these fields.
-
Log: Write the changes made for the group
* Note that these fields are mandatory.
Column Chooser
This option makes it possible to customize which columns should be displayed in the data grid. Some columns are selected by default. When selecting it, you will be presented with a small window that contains all the columns that are not currently in use.
You can scroll while hovering your mouse over window box to see additional columns. To insert a new column you must drag it from the window to to the data grid. A blue line will appear when dragging, which means the column will be placed between the two columns. You can drag any column back to the window in the same manner. See the animation below for further reference.
Search
The search box will perform its search on the entire data grid and will exclude the rows that do not match the search dynamically. For example you can search for "Admin" to only see usergroups that have admin roles. Press the 'x' next to the search term to reset the search.
Reset
Clicking this will reset the state of the grid to the default state. This means that all current sorting, grouping, filtering etc. will be reset. If you have placed or removed any columns via the column chooser, these will be reset as well.
Group Functions [2]
These functions affect a single group or row and can be found in the rightmost column of the data grid. You may need to scroll horizontally to see these buttons depending on your screen resolution. To scroll, hold your mouse cursor over the data grid and drag the scroll bar that appears at the bottom of the grid.
Show log
Clicking this will open a new window with a data grid showing the logs for the group. (mangler mere tekst)
Edit
Click here to edit the selected user group. A new window with the group details will open. When you are done editing, click the save button at the lower right of the window to save your changes. Click 'Cancel' to abort editing. Note that the name and description fields must be filled out.
Delete
Clicking here will delete the user group. Before deleting you will be prompted to confirm your choice.
Data Grid
There are several functions available on the data grid itself. These will be explained in more detail below.
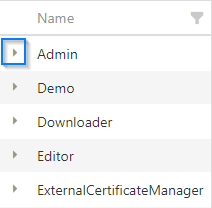
Role details
To see the roles of a particular usergroup as a list, you can click the arrow to the left of the group name. Click the arrow again to hide the list.
Sorting
To sort the data, simply click on the column you wish to sort by. The first sorting done when clicked will be in ascending order. Click the column again to sort in descending order.
Grouping
Organizing data in groups can help you get a quick overview of your data set. To group your data, drag the desired column into the small space above the data grid, where this text is displayed: "Drag a column header here to group by that column". See the animation below for further reference.
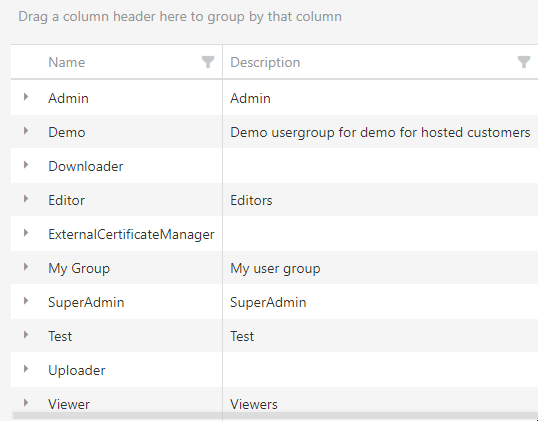
After you have dragged and released the column, a new window will appear, showing how many user groups match each group. Click the small arrow to the left to expand each group and see the individual user groups. You can sort the groups by clicking on the group header.
To add more groups, simply use the same drag and drop method as explained. Each group will then contain several subgroups depending on how many groups you selected.
To return to the standard data grid, you can either drag the groups back onto the data grid, or click the 'Reset' button, which is explained in the 'Data Handling' section on this page.
Security Groups vs. Stakeholder Groups
As you've noticed there are two seperate data grids on the page. The differences between the two kinds of user groups will be explained here.
Security Groups
These are your standard user groups that allow you to set security restrictions on data and functions in your Link solution. Any roles you may have created are available to be added to a user group, allowing you to specify exactly which parts of the system the particular user group has access to.
Stakeholder Groups
These groups are connected to the error handling functionality of Link. A stakeholder group can be set to receive and/or handle a specific set of errors that can occur in your Link solution. This makes it possible to assign error-handling tasks to the entire team at once instead of relying on a single person. See the Error Handling page of this user guide to learn more.
Content on this page: