Create/Edit Monitor Item
On this page you can create new monitor items to use on the 'Monitor' page. In addition they will show up in the list on the 'Monitor Config' page.
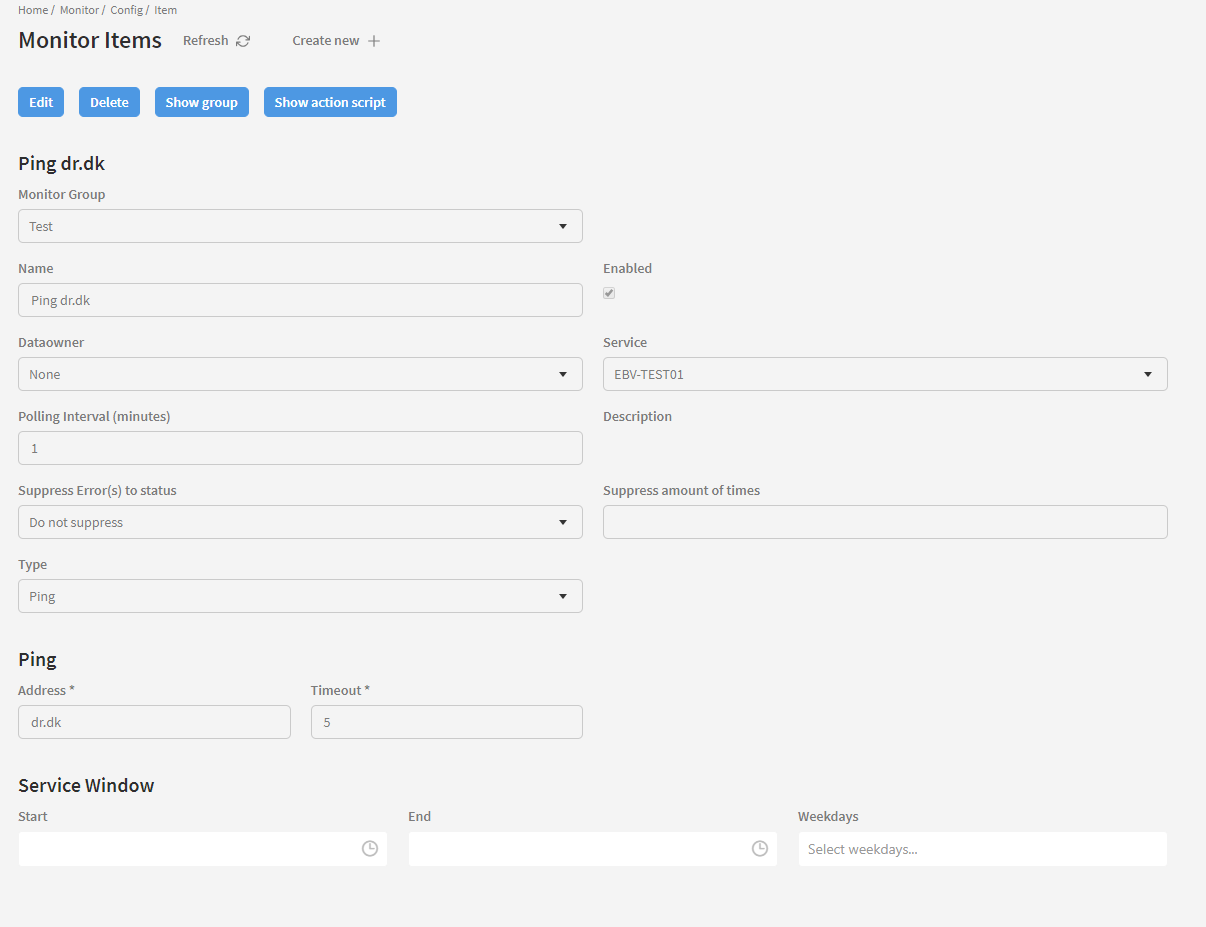
When you create/edit a monitor item, there are some general configurations needed, as well as some that are specifically aimed at the monitor item type that is being configured.
The general monitor item configuration includes giving it a name, associating it with a data owner (not mandatory), choosing a type(monitor item type), assigning a registered service to handle the monitoring, specifying a polling interval forhow often the monitor logic shall be invoked, defining warning and error levels and specifying service windows where the monitoring should be on pause.
Note that the greyed out 'Delete' and 'Show group' buttons are only used when editing a monitor item and are therefore not relevant when creating a monitor item.
Create new monitor item [1]
Each field involved in creating a new monitor item will be described in detail below. When you are done filling in the required fields, press 'Save' to save your changes and create the item. Press 'Cancel' to abort and return to the Monitor config page.
Monitor Group
Mandatory field. Here you can select a monitor group for this monitor item. See the 'Create Monitor Group' page for details on how to create a new monitor group. When viewing the monitor item on the Monitor page, it will be grouped under the selected monitor group.
Name
Mandatory field. Write a name for the monitor item here. Also note the 'Enable' checkbox to the right of this field. This needs to be checked for the monitor item to function.
Dataowner
Optional field. Mangler tekst.
Polling Interval
Mandatory field. Here you can specify the polling interval in minutes, which is the time between each status update on the monitor item. This is set to 1 by default.
Suppress Errors(s) to status / Suppress amount of times
Being able to setup a threshold of how many times an error must occur in a row before an actual error status is show. (It should go to "Warning" first). Also choose which Status it should set if error count threshold is not reached (sometimes we might want Warning to be able to see something is wrong, sometimes we might just want Success).
If we have had two errors, and the threshold is set to 5, and there comes one Ok status, the counter is reset to zero and status set.

Type
Mandatory field. The monitor item type is chosen in this dropdown. Depending on the type chosen, additional fields will become available underneath. These may also be mandatory. Each type is explained on the 'Monitor Item Types' page in this user guide.
Service
Mandatory field. Here you can pick the service to handle the monitoring.
Description
Optional field. You can write a description of the monitor item here.
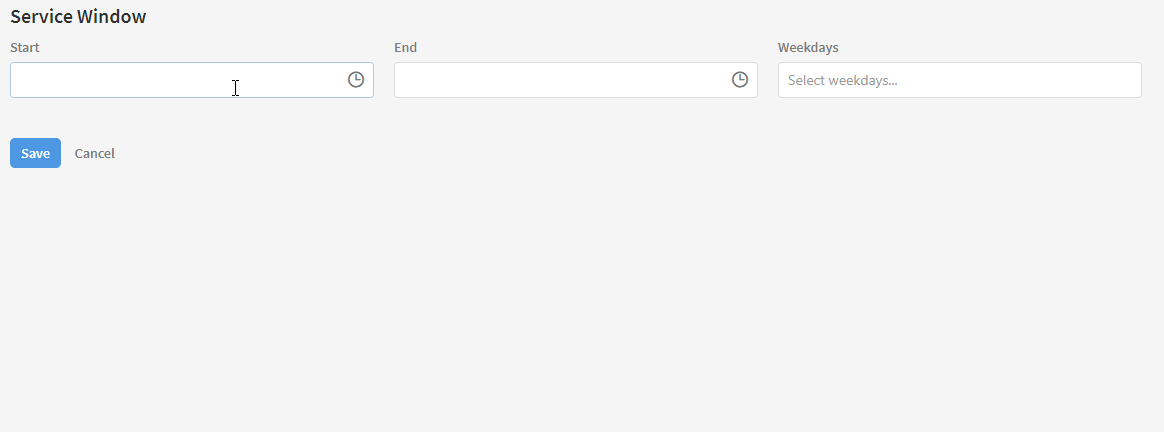
Service Window [2]
These fields allow you to specify the time interval in which the monitor service should be running. Select the 'Start' and 'End' time by either clicking the clock icon or write a time in the field. Note that hours and minutes are seperated by a dot. In the 'Weekdays' field you can select the days of the week the monitor item should run in the specified time interval. You can deselect a day by clicking the 'x' icon next to it. See the animation below for reference.
Content on this page: