Setting up error-handling
Error handling
NOTE: This document is relevant for releases older than v. 3.0.9091.20157. If your Link system is running a newer release, please refer to this article instead.
After having set up your Stakeholders, you are now ready to configure how Link should handle document errors.
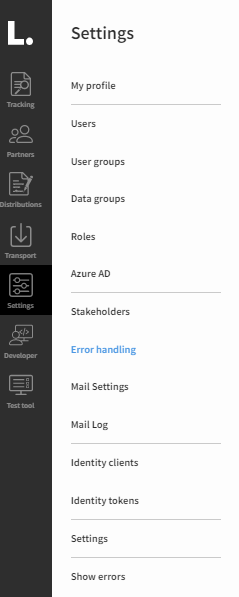
You will find the configuration page under “Settings” in the main menu.

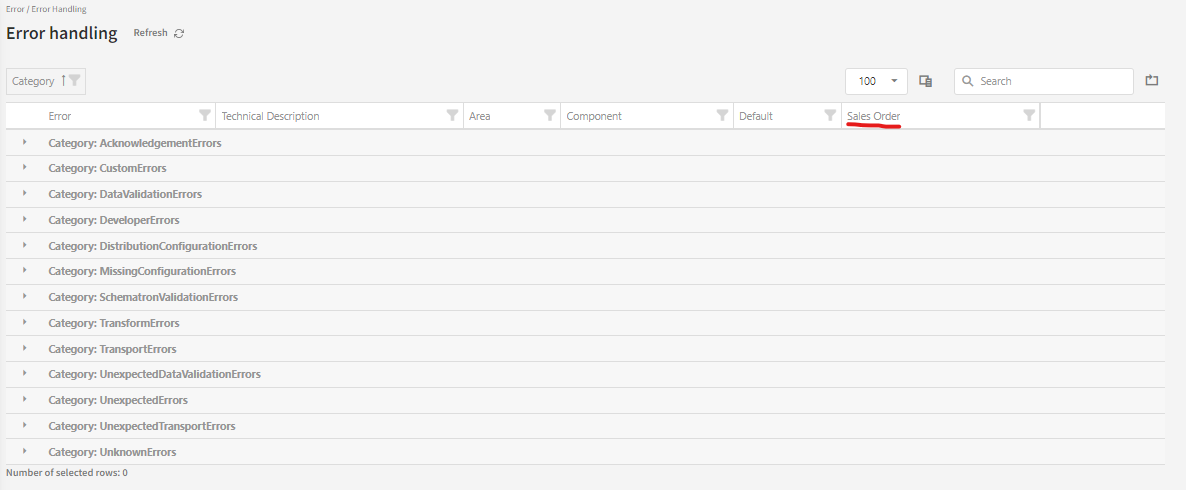
Stakeholders in the error handling data grid
You are now presented with a list of predefined error categories presented in the Link data grid. if you haven’t done so already, remember to read the article Data grids.
Normal Link users only need to understand that there are several categories of error and under each category there are many different error codes (it’s even possible to create you own). Working with these in detail is for advanced users / developers - they can read more about the topic in the Link technical guide.
In this example, you can see the document type “Sales Order” appearing as a column in the grid. This means, that a configuration has been made in relation to this Stakeholder - all document types with stakeholder configurations will automatically appear in the data grid. Note that if no stakeholder configuration has been done for a document type, it will not appear in the data grid.

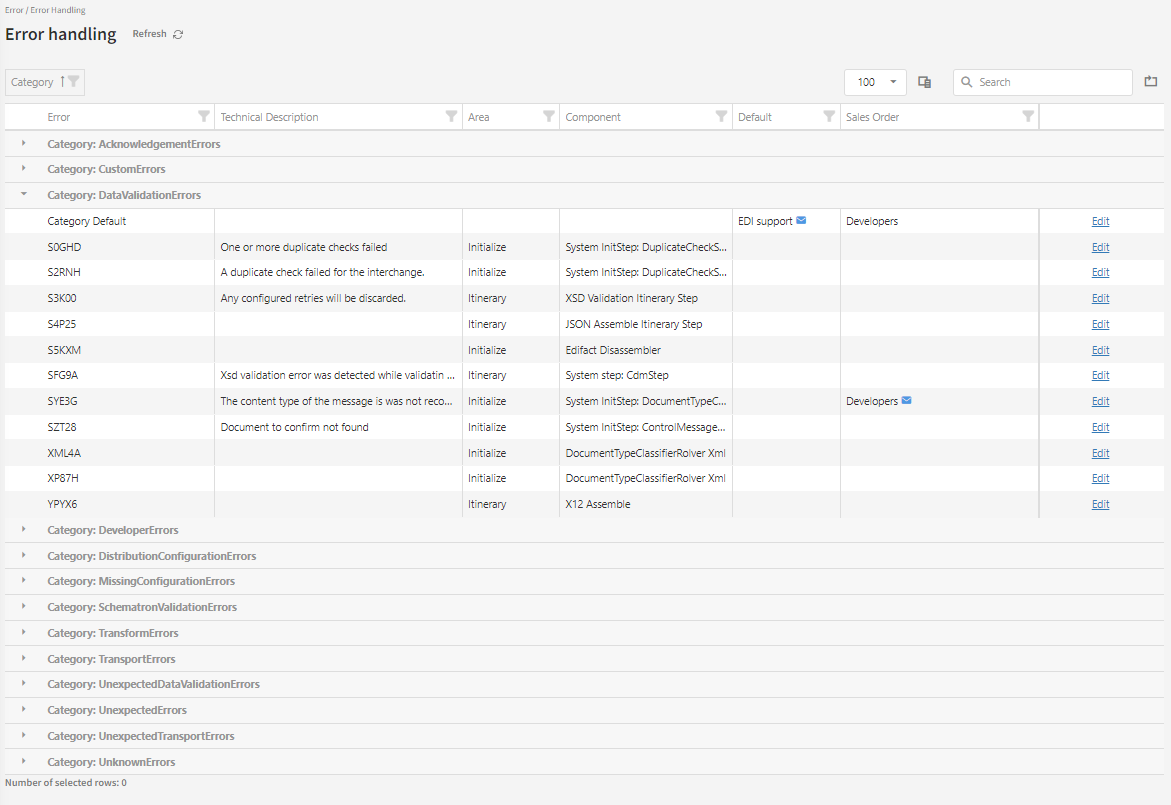
Too view or edit any stakeholder configuration, you need to open each category by clicking the arrow next to the category label.

In this example, the stakeholder “EDI support” has been assigned to all errors (they are assigned as Default) with the error code category “DataValidationErrors” - except for the error code SYE3G which for Sales orders will be handled by the “Developers” stakeholder.
Hopefully, you can see from this example that it’s possible to fine-tune who should act as Stakeholder in very specific scenarios - each combination of error categories / error codes and document types can have an assigned stakeholder.
When assigning your stakeholders to error codes and/or categories, it is a good idea to do this in collaboration with developers to avoid misunderstandings.
The columns “Error”, “Technical Description”, “Area” and “Component” are all non-editable fields configured on the error codes and error code categories.
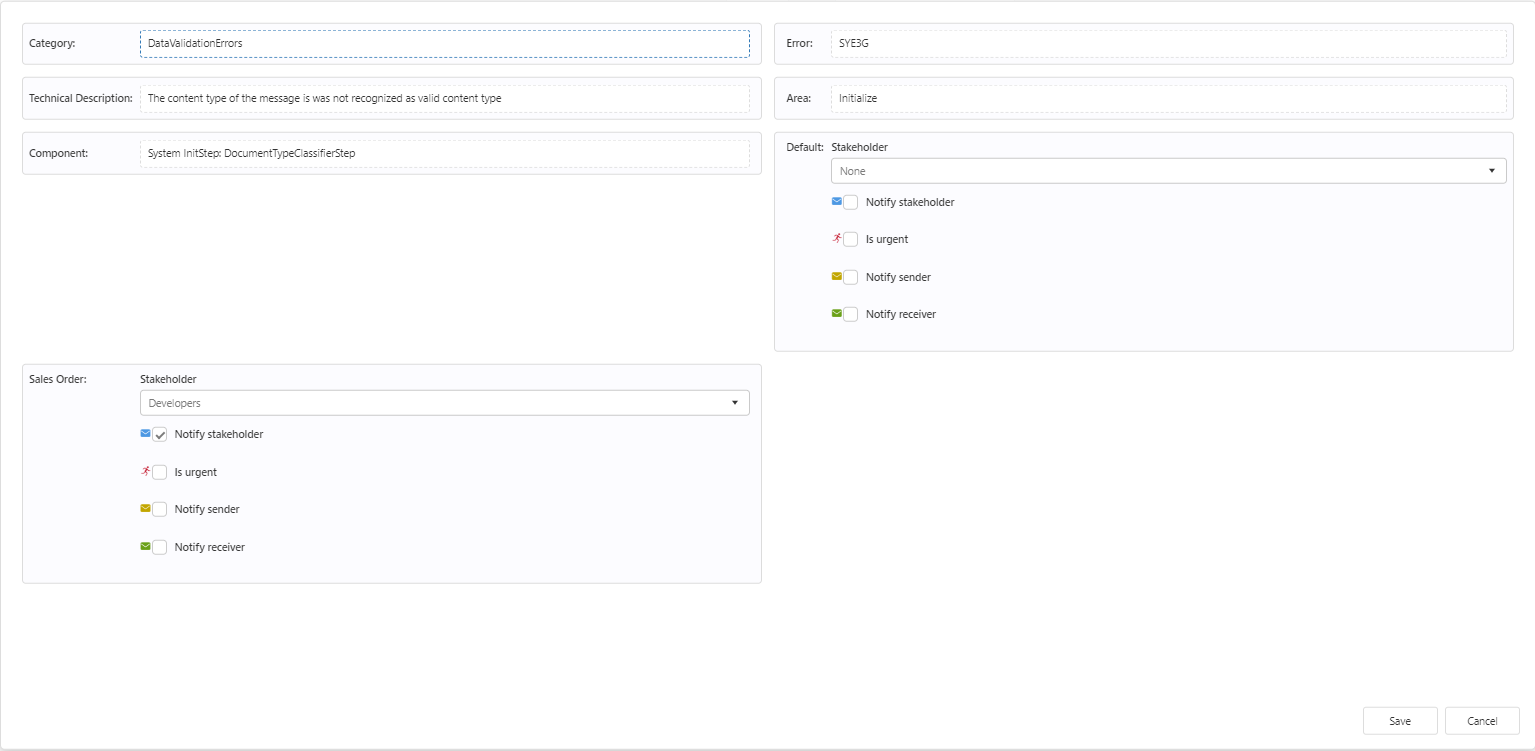
The Error handling detail page
If you click Edit at the right side of a line you will see how an individual configuration is set up.

On this screen you can see the configuration options “Stakeholder”, “Notify stakeholder”, “Is urgent”, “Notify sender” and “Notify receiver” appearing for the Default level as well for each available document type. In this example we only have the document type “Sales Order” available, but if there were more configured there would also be configuration sections for those visible.
In order to set the stakeholder as active for the relevant section, you must check the box “Notify stakeholder”.
Note. The important concept to understand is that if there is a stakeholder configuration for at specific document type, this will take precedence over the Default configuration.
Urgency and notification of senders and receivers
We will now explain how the fields “Is urgent”, “Notify sender” and “Notify receiver” works.
Is urgent
If this checkbox is ticked, Link will send a notification to the e-mail address configured in the “Email urgent” field on the stakeholder. Often, Link customers choose to associate an SMS-gateway with this e-mail, the purpose being that urgent notifications are read as fast as possible.
Note that the red icon will appear in the data grid if this option is enabled.
Notify sender
If this checkbox is ticked, Link will send a notification to the e-mail address configured on the first technical contact person registered under the partner that sent the relevant document.
Note that the yellow icon will appear in the data grid if this option is selected.
Notify receiver
If this checkbox is ticked, Link will send a notification to the e-mail address configured on the first technical contact person registered under the partner that should receive the relevant document.
You can read more about setting up the contact persons on partners in this article: Contacts.
Note that the green icon will appear in the data grid if this option is enabled.
