Distribution Search Details
The distribution details page contains all the information you need to know about a single distribution. Depending on the number of distributions selected in the list, tabs may be shown at the top of the page, which will allow you to quickly switch between each distribution.
When creating new distributions, this page layout will also be used to input data.
As the Distribution Search Details page contains a lot of elements, each part of the page will be divided into its own section, starting from the top of the page.
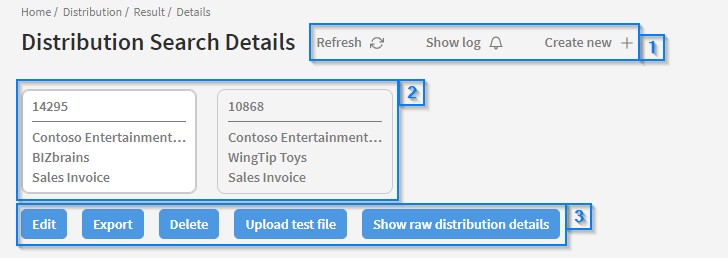
In this example we have chosen two distributions, so a tab is created for each. Click the corresponding tab to see the details of that distribution.
Each element shown in the screenshot above will be explained in detail below.
Header Actions [1]
Refresh
Clicking this will refresh all data in the currently opened distribution.
Show log
Press this to be shown a pop-up of the distribution log. This will contain all the actions that have been performed on the distribution. See the 'Show Log' page in the user guide for more information about the different columns.

Create new
Click this if you want to create a new distribution. You will be redirected to the 'Create New Distribution' page. Creating distributions is explained on a seperate page in the user guide.
Distribution Tabs [2]
Select each tab to show details about the distribution. The tab itself contains some information about the distribution. From top to bottom these are:
-
Distribution Id
-
From Partner
-
To Partner
-
Document Type
When you select a tab, all actions taken on the page will only be performed on the selected distribution.
Action Buttons [3]
These buttons perform various actions on the distribution. They will be explained in detail below.
Edit
When you first open the Distribution Search Details page, the fields will be locked for editing. Clicking this button will allow you to edit the distribution data. What each field does will be described in its own section on this page. Press the 'Save' button that has now replaced the 'Edit' button to save your changes, or press 'Cancel' to cancel your changes.
Export
Clicking this will export the raw distribution data in XML format.
Delete
Press this to delete the distribution. A pop-up asking whether you are sure about the deletion will be shown first. Note that deleting a distribution is irreversible.
Upload test file
This allows you to manually process a testfile through the normal handling of the document as if it was processed automatic. When you press the button, a pop-up allowing you to choose a local file will be shown. After selecting a document, some information about the document will be revealed as shown in the screenshot below.
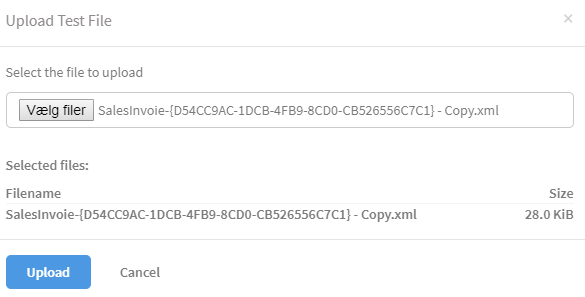
It is also possible to upload multiple files at once. To do this, simply select all the files you want uploaded in the File explorer. Each file to be uploaded will be shown under 'Selected files'.
When you are done selecting files, press 'Upload' to be redirected to the Tracking Search Details page.
Show raw distribution details
Click this to see all technical details relating to the distribution. They will not be explained further here.
From Partner/To Partner

This section contains details about the partners associated with the distribution, as well as their locations.
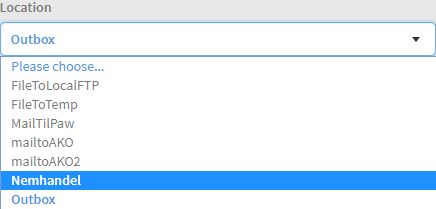
To change the location of a partner, you must first press the 'Edit' button as explained under the 'Action Buttons' section on this page. Different locations registered on the partner can be shown in a dropdown. Select the new location for the partner here.
Note that global locations are written in blue and bold text, while locations associated with the partner are not.
Also note that you cannot change the location back from Outbox if there are documents in the system who have the status of 'Outbox'.
You can also select new partners for the distribution. Select the partner field to open a new window, where you can search across all partners in your Link solution.
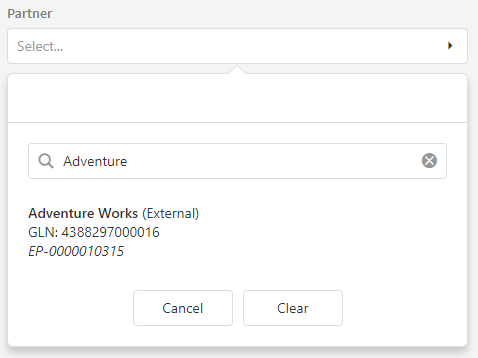
When you start writing, any partners that match the search term will show up below the search box. Both the partner name and the partner identification can be used as a search term. You can select the partner from here, which will close the search window. Select clear to reset the partner search. Select cancel to keep the current partner and close the search window.
Acknowledgement Out/In

Acknowledgement Out
The options here are related to the From partner. The ‘Send acknowledgement’ checkbox should be ticked if you want Link to generate an acknowledgement message and send it to the sender of the incoming document.
Acknowledgement In
The options here are related to the To partner. If you want to receive an acknowledgement message from the document receiver, you should tick the ‘Expect acknowledgement’ checkbox. Doing so will cause all documents in this distribution to get the status ‘Awaiting acknowledgment’ instead of ‘Complete’ when the document has been delivered. When the acknowledgement message has been received, the document will then change to ‘Complete’ status.
You can set timeout for the acknowledgement message in the ‘Timeout’ field.
You can flag all outgoing messages as test messages by ticking the ‘Test indicator’ checkbox. This is useful when you want to test your distributions before you take them to production.
From Format/To Format
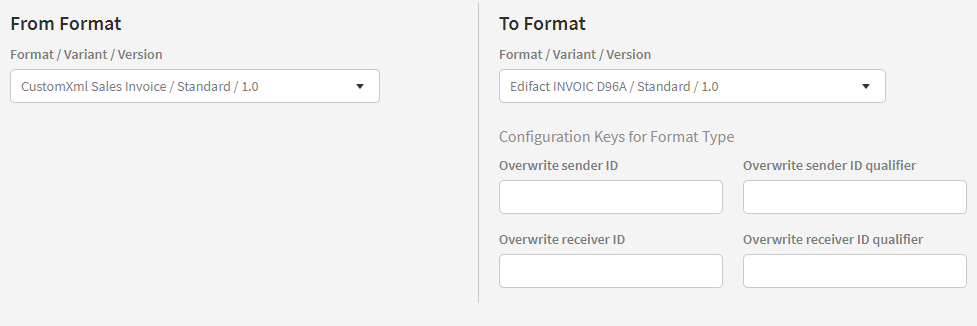
The format section contains information about the sending and receiving format. Here you can specify the exact format/variant/version of both the incoming and the outgoing message. The options available to you will depend on your installation so it makes no sense to detail them here. If you think something is missing from these lists, you should contact your administrator – but remember that the available choices will change according to the document type of the distribution.
Configuration Keys for Format Type
If any configuration keys have been created for this format type, they will appear here. Each field corresponds to one configuration key.
Advanced
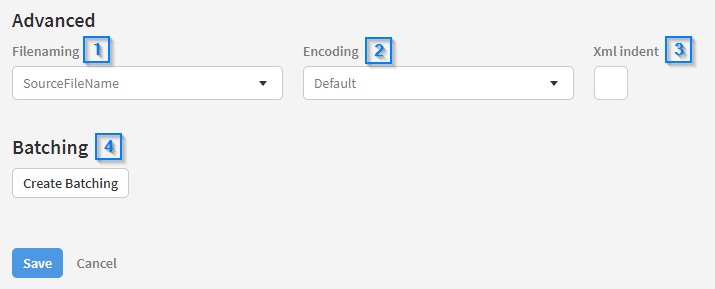
This section contains advanced distribution settings. Depending on the formats involved in the distribution, more options may be available here. Each setting will be explained below.
Filenaming [1]
If a specific filename mask has been created for this document type, it will appear in the dropdown. Select it from the dropdown to use it with the distribution.
Encoding [2]
Lets you change the encoding of the documents being sent.
XML indent [3]
Tick this checkbox to have the XML output formatted in a readable manner. Most XML documents are already formatted, so in most cases you will not need to enable this.
Batching [4]
This is explained on the 'Create Batching' page in the user guide.
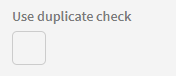
Use duplicate check
Some fomats may have a duplicate check enabled. If that's the case, you will see an option to enable and use duplicate check. See the 'Duplicate Check' page in the user guide for more information.
Content on this page: