Tracking Search Details
Please note that through the Document search result screen, you may have selected to view several documents together. In this case, the individual documents are visible as separate boxes in the top of the screen, as shown in the figure below.
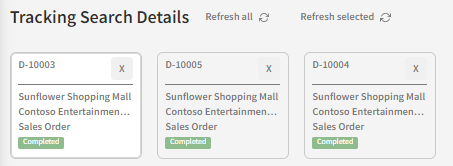
You can switch between the documents simply by clicking on them. To remove a document, click on the top-right corner of the corresponding box.
Overview
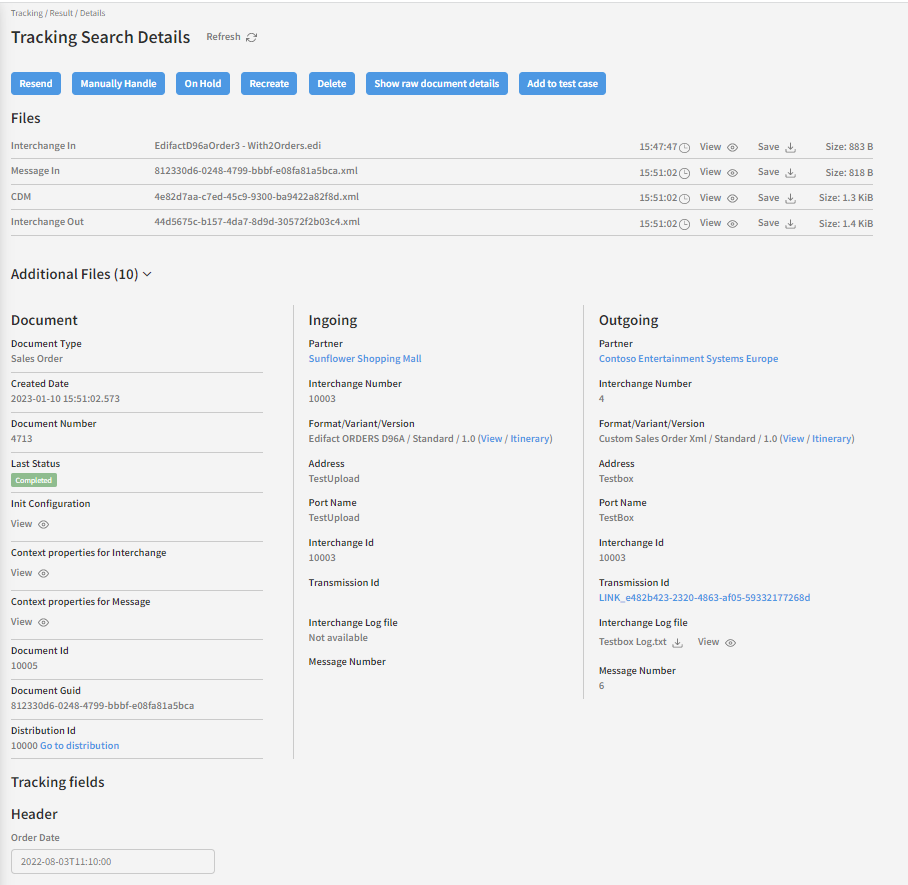
There is a a lot of information on the document detail page as well as many different possible actions and available features.
If a document has a "Failed status", there will be more information available for that document. Read more in the Failed documents section. If you would like to read more about how to troubleshoot failed documents, please read the Self-service support for the business article.
Some users might be confused by the amount of information presented here - lots of it is pretty technical. But one of Link's key strengths is that it provides very detailed information - all presented in one place. Here we´ll go through all the sections, files, fields and logs shown on the screen from top to bottom.
Action buttons
Depending a Link user's permissions, there will be action buttons available from the document detail page. Several of these are identical to the ones present on the document search result page and you can read about what you can do with them in the Document action buttons section.

Files

This section of the screen gives you the ability to download and view the document in all the different ways it looked during each stage of the document flow. If you are not familiar with these concepts, please read the Document stages article.
You can download the state of the document for each stage by clicking "Save". If you just want to view it, click "View. You can also view the document in a more reader friendly format by clicking "Print". The "Print" option however, is only available if it has been correctly set up. Developers can read about how to set this the "Print" option in the Link technical guide. The "Size" field shown to the right of each document refers to the size of the zipped document.

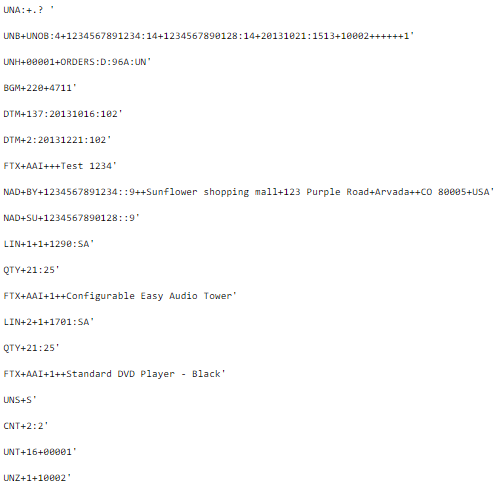
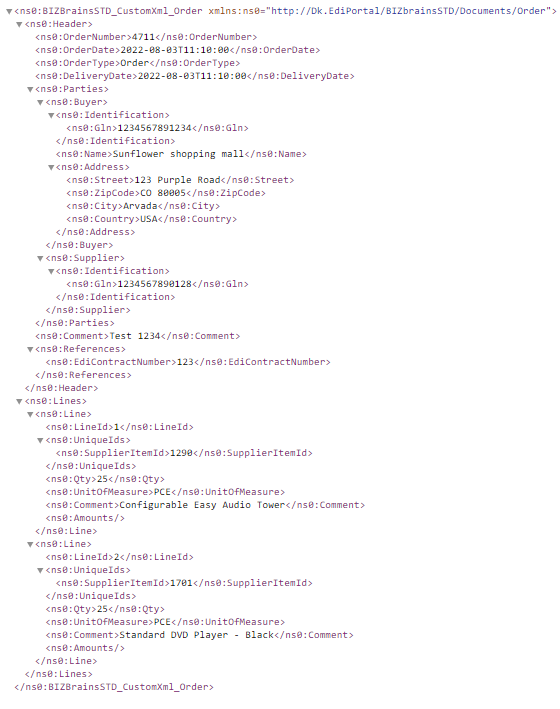
In this example, a sales order was received in EDIFACT format and sent in a custom XML format. We can compare them by clicking "View" on the "Interchange In" and "Interchange Out" rows:
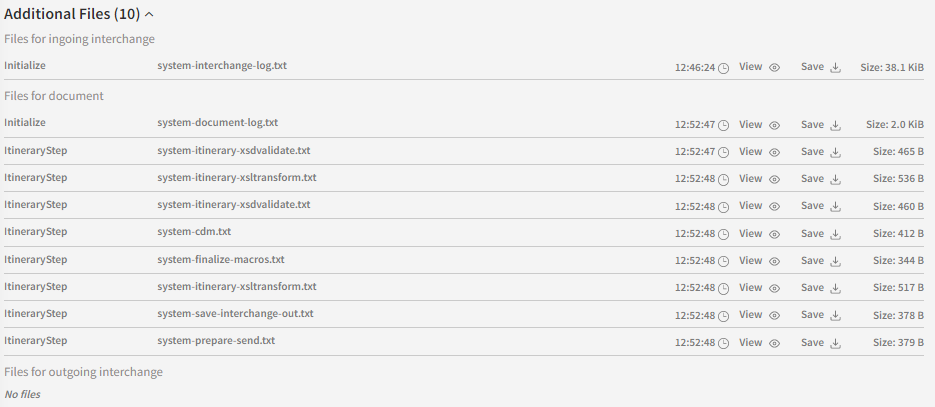
Additional Files
This section is intended only for advanced users/developers.
Each row on the list shows additional logging information for each step which is useful for developers troubleshooting advanced integration scenarios.
Document
The Document section contains detailed information about the document. Depending on the document and its current status, some data may not be available. It also contains a shortcut to the distribution associated with the document.
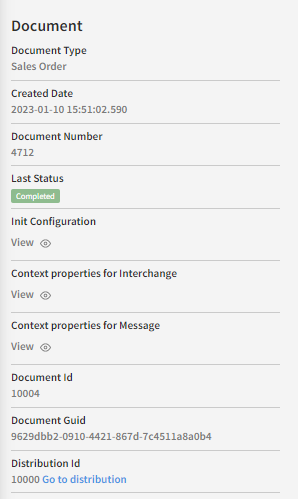
Document Type
This option show the document type, e.g. Purchase Invoice, Sales Order etc.
Created Date
This options shows the time and date the document was created.
Document Number
This option shows the unique document number. The number will vary, depending on the document type and exactly which field it refers to.
Last Status
This option shows the last recorded status of the document.
Init Configuration
This field is intended only for advanced users/developers and contains the document configuration when it entered Link.
Context properties for Interchange
This field is intended only for advanced users/developers and contains metadata for the interchange before being disassembled. This information will only show if it has been saved by the system.
Context properties for Message
This field is intended only for advanced users/developers and contains metadata about the message after being disassembled. This information will only show if it has been saved by the system.
Document ID
This option will display a unique ID assigned to the document by Link.
Document GUID
This option shows the unique GUID assigned to the document by Link.
Distribution ID
This option displays the distribution id and contains a link to the distribution associated with the document.
Ingoing/Outgoing
The ingoing and outgoing sections contain information about the sender and receiving partners.
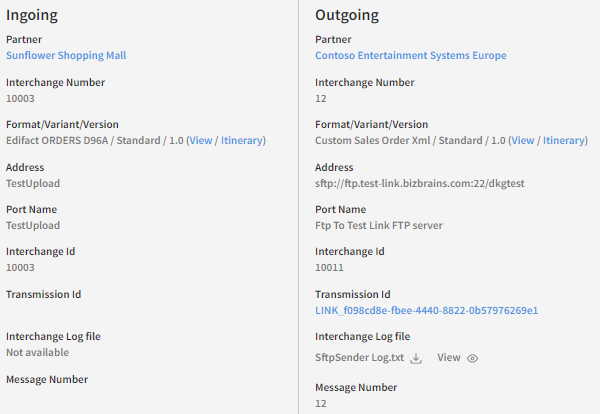
Partner
This section shows the partner name. Click it to be redirected to the page assigned to that partner.
Interchange Number
If the incoming message format supports interchange number (e.g. EDIFACT and X12) it will be shown here. In other cases, it will be auto-generated for the outgoing message.
Format/Variant/Version
This section shows the format, variant and version of the document.
Address
This section displays the address from where the document was received/sent. The format will vary upon the used protocol.
Port Name
This section displays the name of the transport location that was used when receiving/sending the document.
Interchange Id
This section displayed the auto-generated interchange ID and is mainly used for internal systems.
Transmission Id
This section displays the ID of the transmission and is only supported by some transport types.
Interchange Log File
This section displays the transport log file and is only available for some protocols. In the example above, an SFTP-log file is available for the sending of the document.

Message Number
If the incoming message format supports message number (e.g. EDIFACT and X12) it will be shown here. In other cases, it will be auto-generated for the outgoing message.
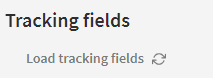
Tracking Fields
If any tracking fields have been configured for the document type, these can be shown here. Click 'Load tracking fields' to display them on the page. Read the Tracking fields page in the user guide for more information on tracking fields.
Status Flow
At the bottom of the tracking search detail page is the status flow. This contains information about the various steps that have occurred in the document flow, such as messages being sent and received. This information is especially useful if there are several servers involved in the document flow. Each step contains data about the current status of the document at that time as well as a short description of what occurred. The status flow is displayed as a data grid, which means it supports standard sorting, filtering and grouping functionality. Please read the Data grids section if you are unfamiliar with this.

By default, this list only shows simple logging. If you need more technical logging info to be displayed, check the 'Include technical status types' checkbox.
Status events
Status events is an advanced topic that is not relevant in all Link setups. If you are not familiar with this concept you can read more in the Status events article.
It there are any associated status events with the document, they can be loaded by clicking the "Load status events" symbol.
This will give you a grid showing the associated status events as well as a few action buttons.

Here we will refer to the Status event result section where both grid content and buttons are explained in detail.
Content on this page: